How to Properly Bandage a Dog's Tail?
When your dog starts showing signs of discomfort, it's important to consider the possibility of a tail infection. Your dog's tail serves as an important means of communication and balance, and changes in its condition can offer valuable insights into their overall health. Recognizing the symptoms early, understanding what causes infections, and seeking appropriate treatment can prevent serious complications and expensive veterinary bills.
Recognizing the Symptoms of an Infected Tail
The first step in addressing an infected tail is recognizing the warning signs. Watch for these symptoms:
- Licking or biting - Often the first sign something is wrong
- Visible changes: Redness, swelling, or unusual discharge around the tail area
- Blood or discharge: You may notice it on bedding, floors, or walls
- Foul odor: A strong, unpleasant smell coming from the tail signals infection
- Behavioral changes: Whimpering, tail chasing, or showing aversion to being touched near the tail
- Physical discomfort: Reluctance to sit or lie down normally
If you notice any of these signs, take action quickly. Infections can worsen rapidly without proper care.
Common Causes of Tail Infections
Several factors can lead to an infected tail in dogs:
Trauma and Injury
Physical damage is a leading cause of tail infections:
- Bites from other animals
- Getting caught in doors or crates
- Accidents or impacts
- Repeated wagging against hard surfaces (happy tail syndrome)
When the skin barrier is compromised through injury, bacteria can easily invade and cause infection.
Poor Hygiene and Environmental Factors
- Infrequent grooming
- Debris accumulation in tail fur
- Moist environments that promote bacterial growth
Underlying Medical Conditions
Certain health issues can make dogs more susceptible to infections:
- Allergies
- Cysts or growths
- Old injuries that never fully healed
- Autoimmune disorders that weaken the immune system
When to Seek Veterinary Care
If you suspect your dog has a tail infection, contact your veterinarian immediately. Early professional intervention can prevent the infection from spreading and causing serious complications.
Your vet will examine the tail to identify the root cause and determine the best treatment approach. Depending on the severity, treatment options may include:
- Antibiotics: To fight bacterial infection
- Topical ointments: To promote healing and reduce inflammation
- Pain medication: To keep your dog comfortable during recovery
- Activity restriction: To prevent further injury while healing
- Laser debridement or scraping: To remove damaged or necrotic (dead) tissue and save the tail
- Partial amputation: In severe cases, vets often recommend removing part of the tail to prevent the infection from spreading
Home Care for an Infected Tail
While professional veterinary care is essential, you can support the healing process at home:
Keep the Area Clean and Dry
- Gently wash the tail with a veterinarian-recommended antiseptic solution
- Pat dry thoroughly—moisture promotes bacterial growth
- Spray with Vetericyn Hydrogel every 5 hours or at least twice daily to reduce infection, pain, and promote faster healing
- For necrotic (blackened) skin, use natural topicals like honey or honey with silver instead of chemical-based products
Prevent Licking and Further Injury
This is essential for healing:
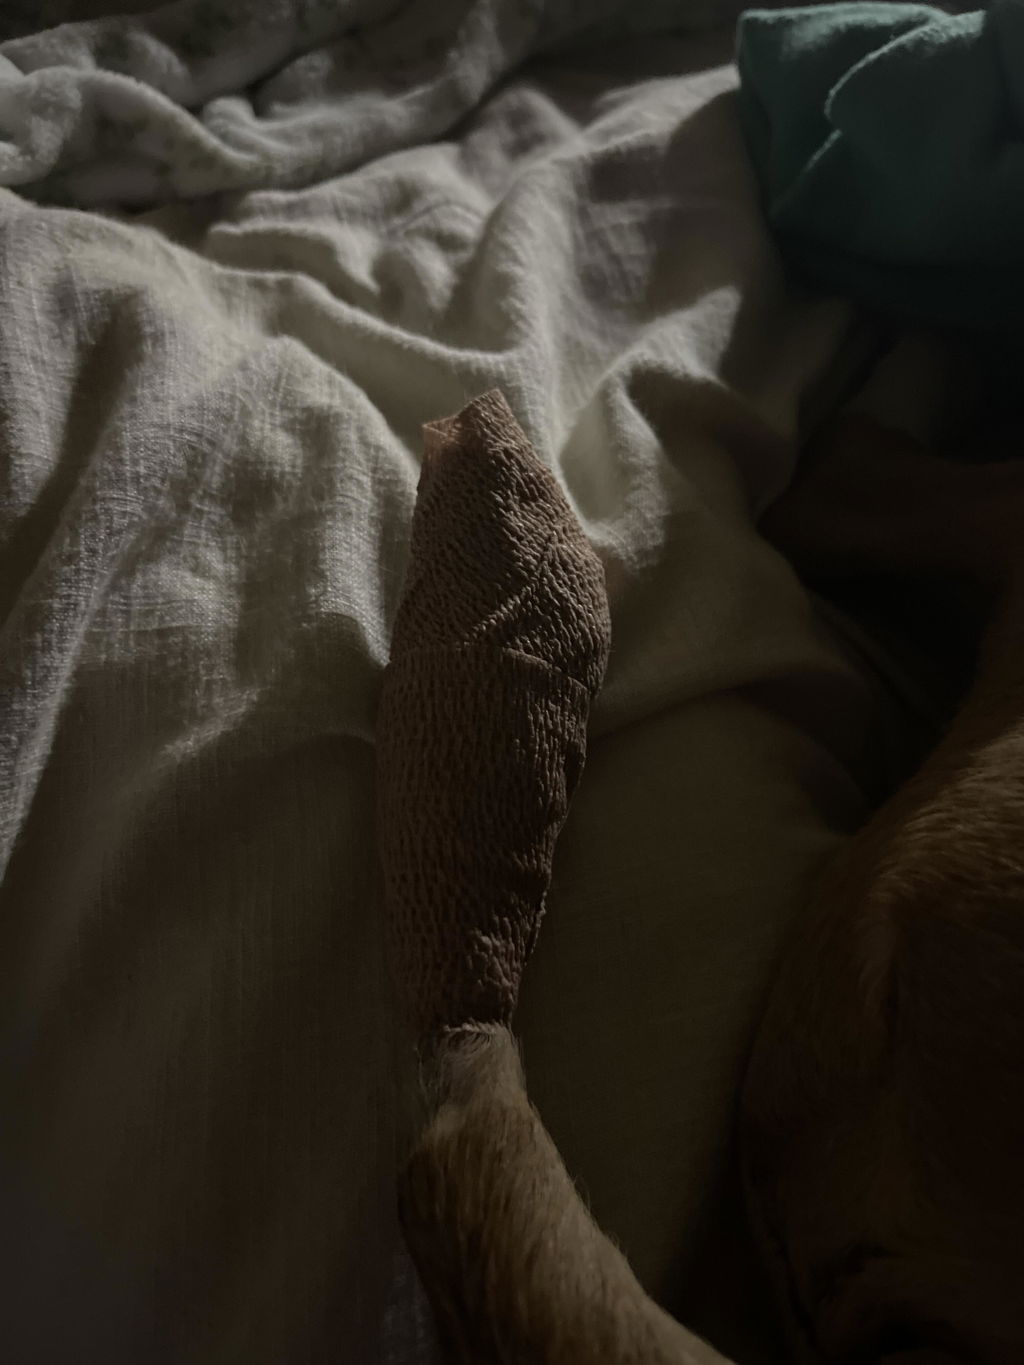
- Avoid traditional bandaging: Bandages create a moist environment that encourages bacterial growth and dogs often eat them, causing digestive blockages
- Cones often don't work: Most dogs can reach past a cone to lick their tail
- Short-term solution: Pull stretchy toddler pants over the hind legs and hips. This works temporarily but requires removing them for bathroom breaks, and dogs may take them off to reach the wound
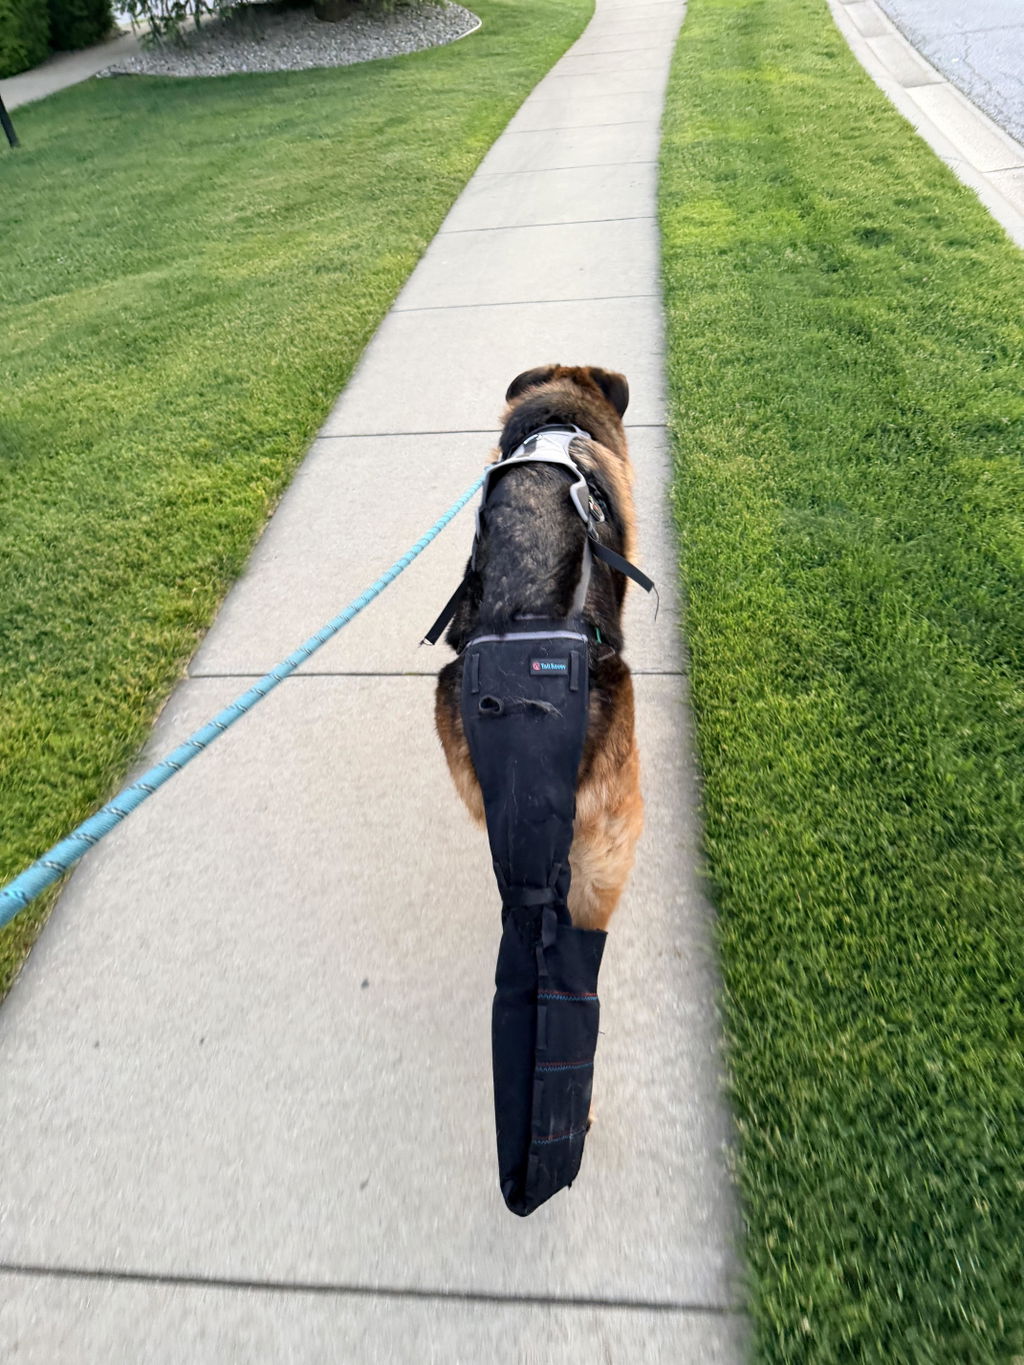
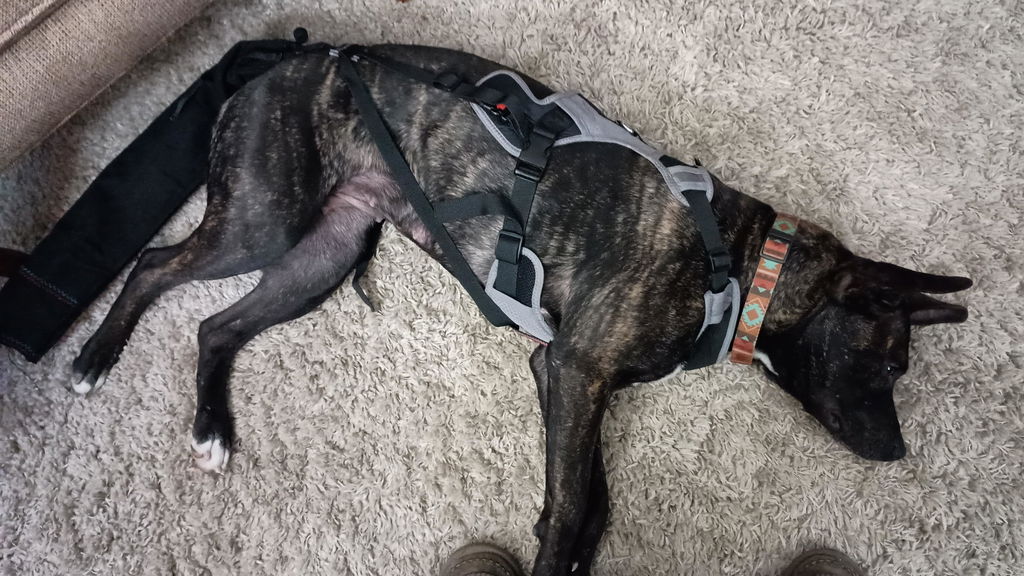
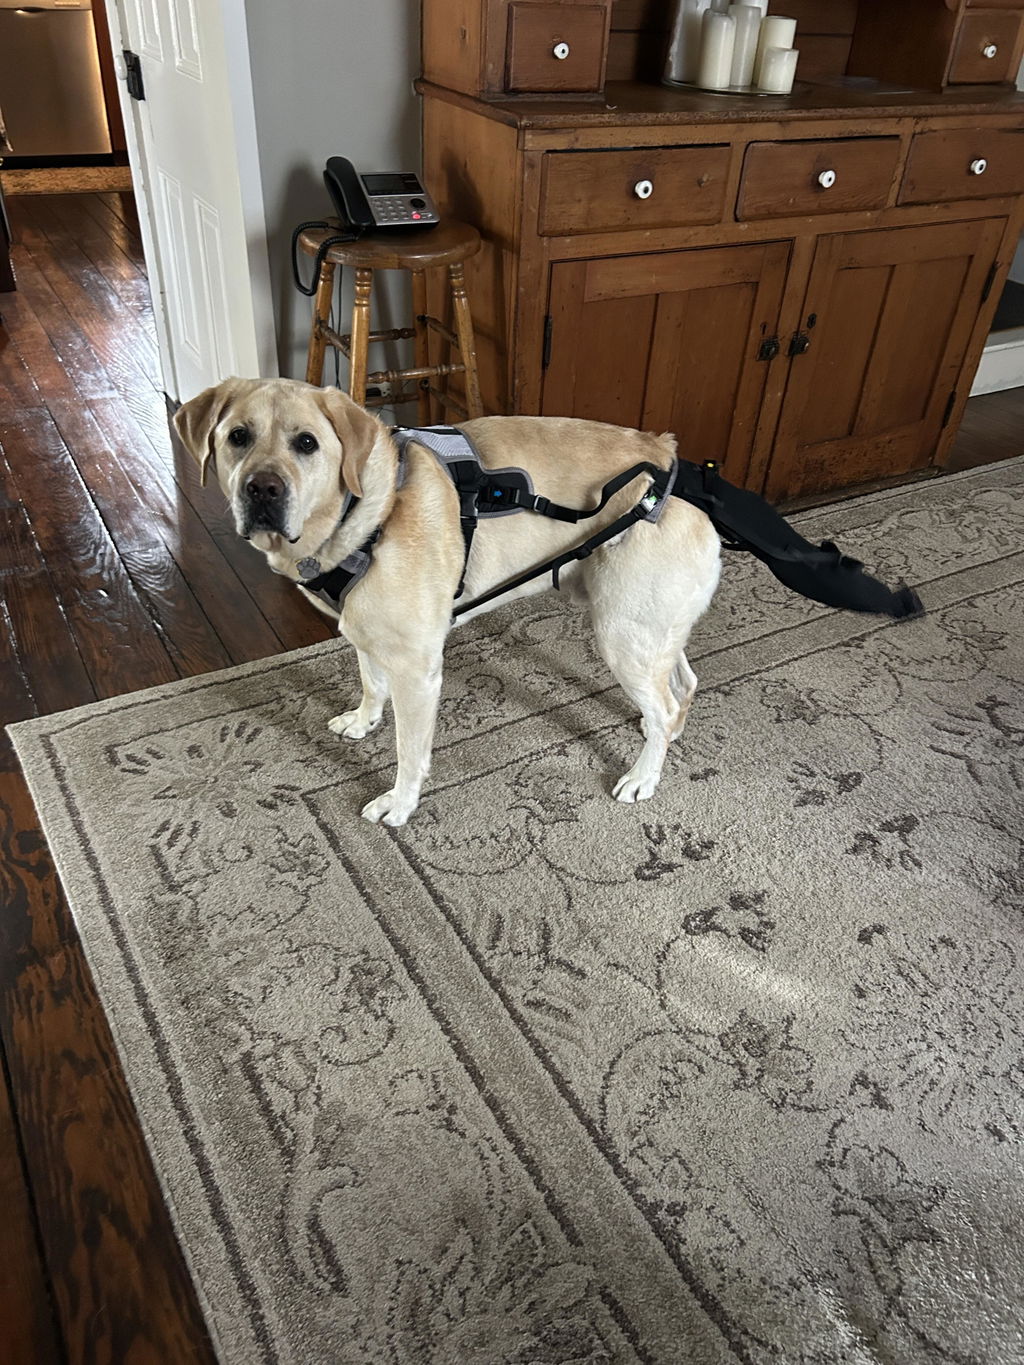
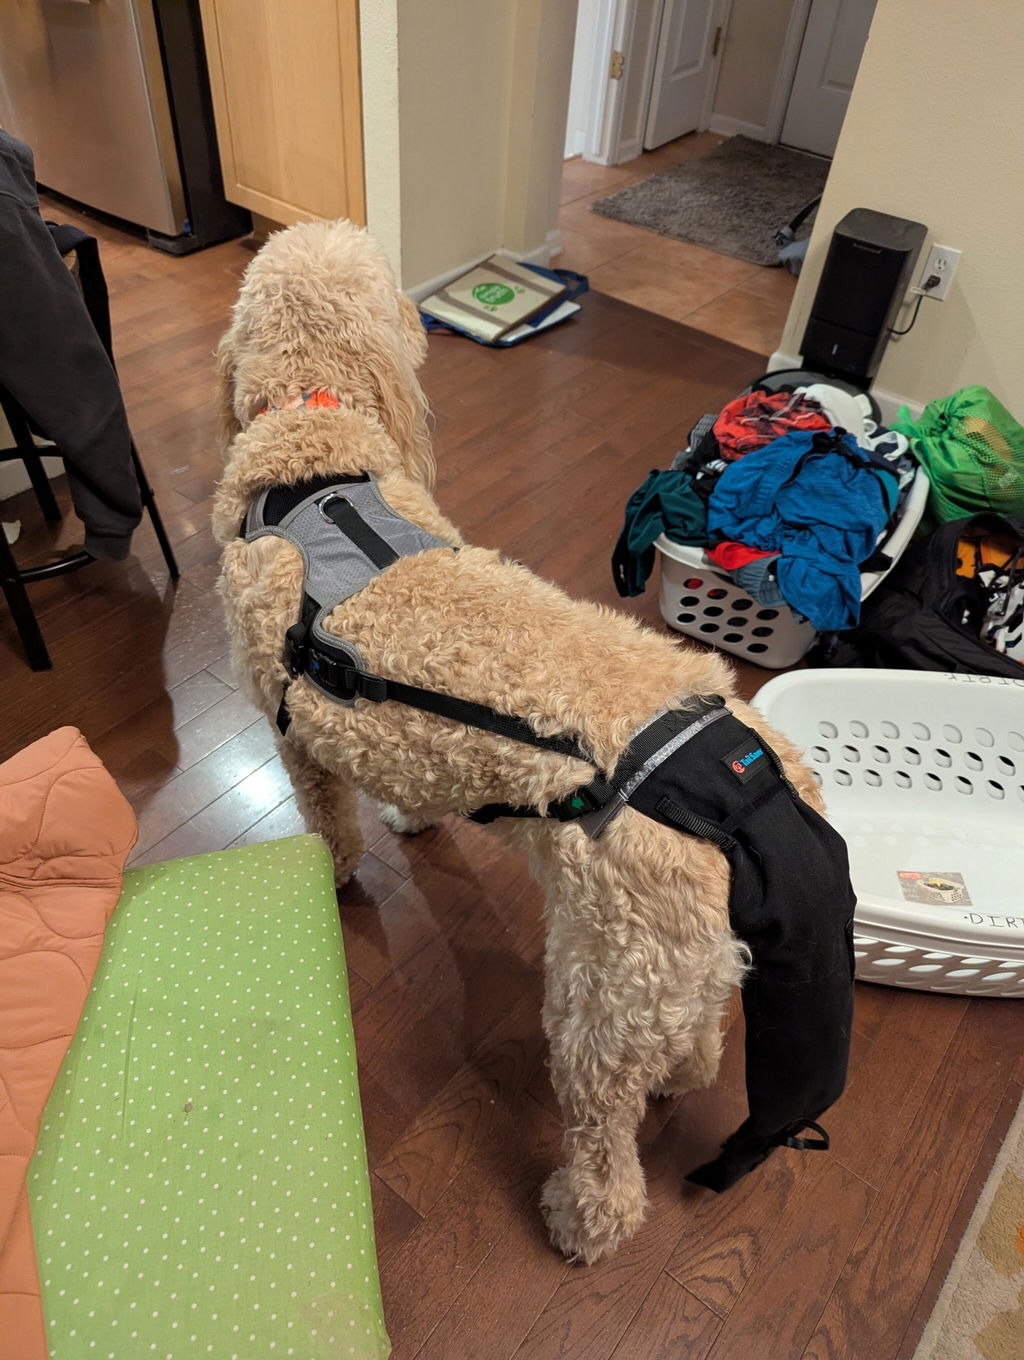
- Long-term solution: The K9 TailSaver stays on continuously, allows bathroom breaks, and dogs don't try to remove it because it's comfortable and doesn't restrict movement
Monitor for Changes
Watch closely for signs that the infection is worsening or improving:
- Increased redness, swelling, or discharge
- Stronger odor
- Behavioral changes indicating more pain
- Fever or lethargy
Contact your vet immediately if you notice any of these warning signs.
Preventing Future Tail Infections
Once your dog has recovered, take proactive steps to prevent recurrence:
- Eliminate hazards: Make your dog's environment safe by removing potential sources of trauma
- Use protection in high-risk situations: If your dog has injured their tail in a crate, at doggy daycare, or during boarding, consider using a K9 TailSaver preventively in these environments
-
Stay vigilant: Watch for changes in behavior or tail licking
or splatters of blood—early detection prevents minor issues from becoming serious

- Address underlying conditions: Work with your vet to manage allergies, skin conditions, or other health issues that increase infection risk
Taking Action for Your Dog's Well-being
An infected tail requires prompt attention and action. By recognizing the symptoms early, seeking professional veterinary care, and implementing proper home care, you can help your dog recover and minimize the risk of amputation.
Remember, your dog's tail is part of their spine and plays an important role in balance and communication. Beyond the emotional distress of seeing your dog in pain, tail infections and potential amputation can be extremely expensive. With proper care and protection, most dogs can heal completely and avoid surgery.
Final Thoughts
Dog tail injuries can be heartbreaking and expensive—but with the right care and protection, most dogs can heal without surgery and get back to their happy selves.
Other Helpful Resources
We believe in helping dog owners find the best care for their pets. Here are some other trusted sites that have helped us and many dog owners:
PetMD - Happy Tail Syndrome Guide
Expert vet advice on happy tail syndrome treatment and care.
Have Dog Will Travel
Great tips for traveling with dogs and keeping them safe on the go.
Brian's Bandages
Quality bandaging supplies for pet injuries.
PetHelpful
Helpful articles and advice for all kinds of pet care needs.
Continue Your Research
What to do next
If you are ready to stop the re-injury cycle, go to the main K9 TailSaver set now. If fit is your only hesitation, run the size finder first. If your dog is between sizes or actively reopening the wound, text support for a faster fit check.
Shop the main K9 TailSaver set
Find my size first | See first-fit instructions | Text support